How To Get Custom Sky Easy In Roblox Rivals? If you’ve been wandering around Roblox Rivals and seen someone rocking a skybox that looks like it came straight out of a cinematic dream — you’re not hallucinating. That’s a custom sky, and yes, you can have one too. Not only is it easier than you think, but it’s also completely safe, doesn’t require hacks, and won’t get you banned.
Let’s walk through how to do it. No tech jargon, no fluff — just the real steps.
How To Get Custom Sky Easy In Roblox Rivals?
Step 1: What You’re Getting Into
This isn’t some shady backdoor trick. You’re not injecting code or bypassing security. You’re using a fan-made utility that’s widely shared, built for players by players. Shoutout to Zorphy, Ricky, and especially Eman, who put together the software that makes it all possible.
Think of it as plug-and-play: one click to install, one click to switch the sky. Done.
Step 2: Join the Discord Server
Start by joining the community. You’ll need to head to discord.gg/donreacts. Once you’re in, look for the “texture sky software” section. That’s where you’ll find the download link for the custom sky tool.
Scroll down, find the link, and click it. You’ll be taken to a page where you can choose to install the latest update — choose “update only what you need” for a quick install.
Once downloaded, extract the ZIP file, run the executable, and follow the prompts. Your antivirus might prompt you — just approve it. This tool is safe and tested by hundreds of users.
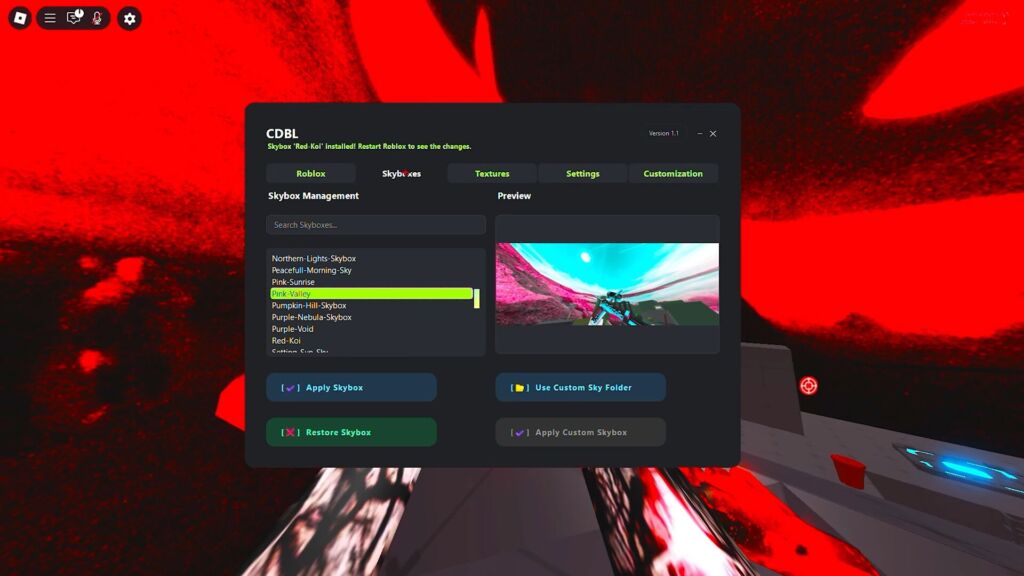
Step 3: How the Software Works
Once the tool is open, it’s smooth sailing:
- Select a sky from the list.
- Hit “Apply Skybox”.
- Launch Roblox Rivals (or your preferred launcher like Fistrap or Blockstrap).
- That’s it — the sky changes the moment you load into a match.
You don’t even need to mess with game files manually — but if you want that level of control, keep reading.
Step 4: Manual Method (For Skybox Collectors)
Inside Don’s Discord server, there’s a “Skyboxes 3.0” section with custom skies you won’t find anywhere else — bold visuals, clean atmospheres, even some surreal ones.
Want to install one manually? Here’s the breakdown:
- Pick your launcher (Fistrap, Blockstrap, or Roblox Player).
- Right-click on your launcher → Open File Location (do this twice until you hit the core folder).
- Navigate through:
versions → version number → platform-content → pc → textures → sky
- Paste the custom sky files here. No need to delete anything — just replace or drop them in.
Now, to make sure everything works perfectly…
Step 5: Use the Skybox Fix
Every time you change your sky, you’ll want to run the Skybox Fix — a simple tool that updates Roblox’s environment to reflect the changes.
You can find this tool in the same Discord section. Download the ZIP, extract it, and run it after placing your new skybox files.
This ensures the sky renders correctly in-game. Don’t skip this step — it’s essential for the manual method.
Step 6: Load In and Enjoy
Now just launch your game using the launcher you installed the sky in. Once you’re outside in any Roblox Rivals lobby or world, look up — your new sky should be there, lighting up the game like never before.
These skies aren’t just cosmetic. They set the tone, change the vibe, and make your whole experience feel different.
Final Thoughts
Custom skies in Roblox Rivals aren’t just possible — they’re easy. Whether you’re using the plug-and-play software or diving into the manual method, you’ll be up and running in minutes.
And if you want access to rare skyboxes you won’t find anywhere else, Don’s Discord server is the place. Exclusive textures, giveaways, and an entire catalog of community-made skies are waiting.
This is how real players upgrade their game. No gimmicks, just results.
Ready to look up at something new? Dive in.
- How to Get the Mimic Octopus in Grow a Garden?
- How to Use the Rainbow Machine in Grow a Garden?
- Summer Harvest Guide for Grow a Garden
- How to get M Rank Summer Monarch in Arise Crossover?
- Rune Slayer Levelling Progression Guide | Level 0-Max 50