
How To Get Easy Mexed Beemy Buddy? I won’t lie—when I heard that a new Spongebob Tower Defense update dropped, I was hyped. Especially since it featured a shiny, five-star version of Bobo with Neptune’s crown. And the best part? It came with a storyline built around a fellow YouTuber, giving it a nice community vibe. But getting my hands on that final evolution wasn’t as easy as it sounded. This is how the whole grind went down—from the first quest to becoming a shiny Bobo champion.
How To Get Easy Mexed Beemy Buddy!
Quest 1: Jellyfish Fields Massacre
The journey began with unlocking the initial quest: take down 1,000 enemies in Jellyfish Fields. Sounds simple? Sort of.
First step: I equipped my Bambi Buddy, Krusty Crab for farming, and Barnacle Boy for cooldown boost. The strategy? Endless Mode on Jellyfish Fields. By wave 3, I had my units placed and farming started. By wave 5, my farms were maxed. I then shifted my Bambi to the front to start spawn-killing enemies.
Damage stats? Bambi at level 1 does about 3,752 damage with a 2.1s cooldown. With Barnacle Boy boosting? Down to 1.6s. Lethal.
Here’s the takedown tracker:
- Wave 14: 200 takedowns
- Wave 26: 400
- Wave 54: 900
- Wave 59: 1,000+
Boom. First quest done in under 10 minutes.
Quest 2: Nightmare Mode Gauntlet

Next up: clear five Nightmare difficulty challenges. It gave me flashbacks to hard-mode runs in other games. I stuck with my previous team but switched to maps where I could breeze through with strategy.
I got wiped once (Bambi wasn’t enough alone), but changed units and used Krusty Crab and Sponge units for a well-balanced offense. Maxed farms early and powered through each round. Each run? Around 2 minutes and 43 seconds.
Five clears later—quest two, done.
Quest 3: 2,000 Kills with Bambi Buddy
This one was a test of patience.
I needed 2,000 takedowns with Bambi, so no other units could do damage. Con Street Endless Mode was the perfect map. I carefully positioned two Bambi Buddies, supported them with cooldown boosts, and made sure no other unit stole a kill.
Wave 106 in… 2,000 kills complete. Total time? Around 17 minutes.
Quest 4: Defeating Manray
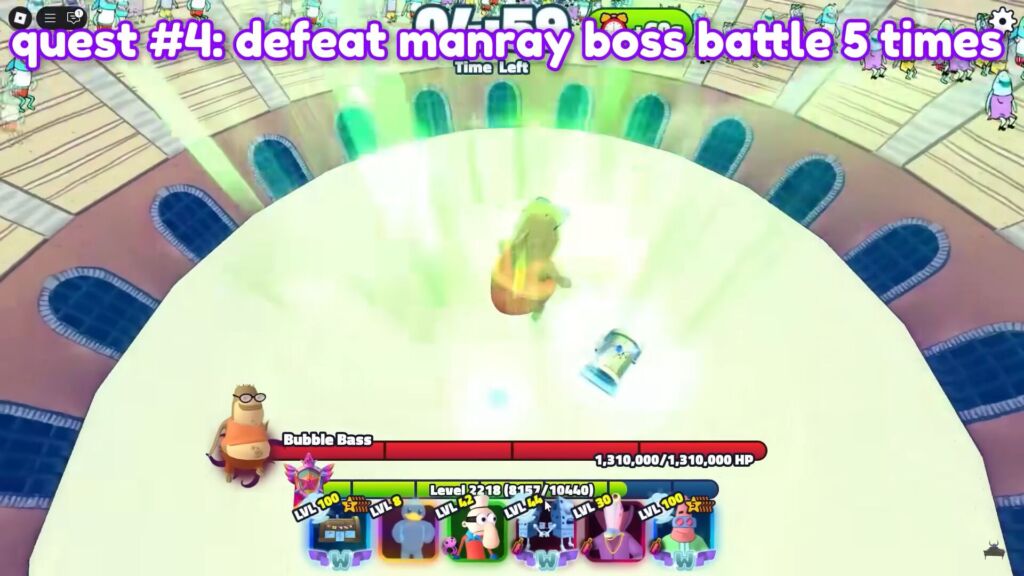
Here’s where things got annoying. I had to defeat Manray five times, but first, I had to unlock his level. That grind took longer than I wanted to admit.
Once there, I used Bambi again and cleared the fight five times. Not too hard—just time-consuming.
Quest 5: Feeding Rare Units
This one was easy once I realized what “feed Betty Bi five rare units” meant—it was literally a button on the UI.
I sacrificed five Slabby Lassos, and boom—done in seconds.
Quest 6: Placing 34 Towers
The challenge was to place 34 towers in story mode. I built a team of cheap, uncommon units and spammed them while keeping one strong unit for defense.
Turns out you need sidekick upgrades to hit the unit count. Once I figured that out, it was easy peasy.
Quest 7: /e Dance
Yes, seriously. All you had to do was type /e dance in the chat. Easiest 5 seconds of my life.
Quest 8: Five Nightmare Raids
Back to grinding—this time completing five raids on Nightmare difficulty. The best map for this? Middle Ages.
I ran these in my private server and auto-played with a solid team. After around 25 waves per run, five clears were complete. Long, but not difficult.
Quest 9: Rare-Only Davy Jones Challenge
Here’s a pro tip: bring a high-level friend. I had my buddy (a level 8,000+ madman) carry me while I used only rare or lower units. He wiped the map while I sat back and watched.
All units placed, all maxed—job done. Quest 9 completed.
Final Rewards and Max Level Farming
After all that, I finally claimed the last quest and was rewarded with the Bubble Taxi and a 2x boosted secret chest. But it didn’t stop there.
To farm the “Power of Friendship” level-up currency fast, I discovered the Manray boss battle trick. Each fight gives you +15 currency and takes just 20 seconds. With an auto-clicker setup, you can farm over 64,000 of it in a day. Insane, right?
Final Thoughts
This wasn’t just a grind—it was a strategy test. You had to plan, adapt, and optimize your units. From Jellyfish Fields to endless boss fights, every quest brought its own curveball. But in the end, that shiny Bobo wasn’t just a flex—it was a badge of grind-earned honor.
If you’re still stuck on any of the quests, go back and recheck your setups. Trust me, with the right layout and timing, every step is possible—even solo.
See you in the next update. Until then, keep grinding, and keep it shiny. ✨
I won’t lie—when I heard that a new Spongebob Tower Defense update dropped, I was hyped. Especially since it featured a shiny, five-star version of Bobo with Neptune’s crown. And the best part? It came with a storyline built around a fellow YouTuber, giving it a nice community vibe. But getting my hands on that final evolution wasn’t as easy as it sounded. This is how the whole grind went down—from the first quest to becoming a shiny Bobo champion.
📜 Quest 1: Jellyfish Fields Massacre
The journey began with unlocking the initial quest: take down 1,000 enemies in Jellyfish Fields. Sounds simple? Sort of.
First step: I equipped my Bambi Buddy, Krusty Crab for farming, and Barnacle Boy for cooldown boost. The strategy? Endless Mode on Jellyfish Fields. By wave 3, I had my units placed and farming started. By wave 5, my farms were maxed. I then shifted my Bambi to the front to start spawn-killing enemies.
Damage stats? Bambi at level 1 does about 3,752 damage with a 2.1s cooldown. With Barnacle Boy boosting? Down to 1.6s. Lethal.
Here’s the takedown tracker:
- Wave 14: 200 takedowns
- Wave 26: 400
- Wave 54: 900
- Wave 59: 1,000+
Boom. First quest done in under 10 minutes.
🧟♂️ Quest 2: Nightmare Mode Gauntlet
Next up: clear five Nightmare difficulty challenges. It gave me flashbacks to hard-mode runs in other games. I stuck with my previous team but switched to maps where I could breeze through with strategy.
I got wiped once (Bambi wasn’t enough alone), but changed units and used Krusty Crab and Sponge units for a well-balanced offense. Maxed farms early and powered through each round. Each run? Around 2 minutes and 43 seconds.
Five clears later—quest two, done.
💀 Quest 3: 2,000 Kills with Bambi Buddy
This one was a test of patience.
I needed 2,000 takedowns with Bambi, so no other units could do damage. Con Street Endless Mode was the perfect map. I carefully positioned two Bambi Buddies, supported them with cooldown boosts, and made sure no other unit stole a kill.
Wave 106 in… 2,000 kills complete. Total time? Around 17 minutes.
👊 Quest 4: Defeating Manray
Here’s where things got annoying. I had to defeat Manray five times, but first, I had to unlock his level. That grind took longer than I wanted to admit.
Once there, I used Bambi again and cleared the fight five times. Not too hard—just time-consuming.
🎁 Quest 5: Feeding Rare Units
This one was easy once I realized what “feed Betty Bi five rare units” meant—it was literally a button on the UI.
I sacrificed five Slabby Lassos, and boom—done in seconds.
🏗 Quest 6: Placing 34 Towers
The challenge was to place 34 towers in story mode. I built a team of cheap, uncommon units and spammed them while keeping one strong unit for defense.
Turns out you need sidekick upgrades to hit the unit count. Once I figured that out, it was easy peasy.
💃 Quest 7: /e Dance
Yes, seriously. All you had to do was type /e dance in the chat. Easiest 5 seconds of my life.
🛡 Quest 8: Five Nightmare Raids
Back to grinding—this time completing five raids on Nightmare difficulty. The best map for this? Middle Ages.
I ran these in my private server and auto-played with a solid team. After around 25 waves per run, five clears were complete. Long, but not difficult.
🧠 Quest 9: Rare-Only Davy Jones Challenge
Here’s a pro tip: bring a high-level friend. I had my buddy (a level 8,000+ madman) carry me while I used only rare or lower units. He wiped the map while I sat back and watched.
All units placed, all maxed—job done. Quest 9 completed.
🎉 Final Rewards and Max Level Farming
After all that, I finally claimed the last quest and was rewarded with the Bubble Taxi and a 2x boosted secret chest. But it didn’t stop there.
To farm the “Power of Friendship” level-up currency fast, I discovered the Manray boss battle trick. Each fight gives you +15 currency and takes just 20 seconds. With an auto-clicker setup, you can farm over 64,000 of it in a day. Insane, right?
🧠 Final Thoughts
This wasn’t just a grind—it was a strategy test. You had to plan, adapt, and optimize your units. From Jellyfish Fields to endless boss fights, every quest brought its own curveball. But in the end, that shiny Bobo wasn’t just a flex—it was a badge of grind-earned honor.
If you’re still stuck on any of the quests, go back and recheck your setups. Trust me, with the right layout and timing, every step is possible—even solo.
See you in the next update. Until then, keep grinding, and keep it shiny. ✨
- How to Get Everything in Loomunity Park Event 2025?
- How To Complete Friendship Update In Grow A Garden?
- How To Get New Amber Lily Early In Grow A Garden?